It has also really handy API methods in hiding. One usually stumbles on them
while looking for something in the superbly commented source code.
I hereby introduce such a handy method and hope to make that into a recurring
thing. Who knows? Eventually this might also grow into a series.
If it does, I would have to find a catchy name for it. “Ember Chispas” came to
mind and rings nice but unfortunately Jeffrey Biles already has a monopoly on it via his
“Ember Sparks” series. (Chispa is Spanish for spark.) We’ll have to talk, Jeffrey :)
Dependency injection (DI) is a less-known, yet powerful feature of the framework
we know and love called Ember.js. It works through the container and is
comprised of two parts: registration and injection.
The framework itself uses it so that the objects instantiated through the
container have the dependencies correctly initialized on them (for the
theoretical programmers out there, the Ember DI system is thus probably
considered a construction-time DI). The API methods are exposed to application
developers for them to register and inject their own objects.
In this first blog post, I’ll introduce the main concepts. In a couple of
further blog posts I intend to dig deeper, give examples of what it can be used
for and show a few gotchas.
Step 1 - Registration
To be able to inject an entity onto others it first has to be registered on the
container. Think of the container as the birthplace of objects in Ember. It
knows how to instantiate objects and look up factories by their name.
Throughout the post, I’ll use the example of a store. If you have worked with
ember-data, the store is the principal piece. It creates model objects and
finds them by their type, id or other criteria so you probably want it to be
accessible from routes and controllers alike.
If you have not come through such a store, don’t despair. It is but a handy example to
illustrate dependency injection and how it works for a singleton object.
Let’s assume we have a reference to the store “class” in a variable called
Store. To register said store, we write the following:
The container now knows the store by the name store:main. That is the name it
has to be referred by subsequently. The singleton: true option
instructs the container not to instantiate a new object each time but use a
singleton instead.
Step 2 - Injection
Once the object/factory is registered, it can be used on other objects in the
application. As mentioned above, a store is best used from controllers and
routes. So let’s inject them there:
The main method, application.inject takes as its first argument the object(s)
where we want the injection to happen, then the injected name and then the name
of what should be injected. The “what should be injected” has to be the same
name we had registered the object previously with.
The first parameter, controller and route define what is called a type
injection. This means the injected name will be available on all instances of
the type, all controllers and routes in this case. The injected name is store
and it refers to a single instance of the store class since that’s how we
defined it at registration time.
We could also just define a simple injection. In a somewhat hypotethical
example, let’s assume we only need the store on the artists route. We write the
following to achieve that:
Let’s say we want to create an artist object in a route and that creating
objects happens through the store (as it does in ember-data, e.g). The following
snippets set up the injection:
I also created a jsbin to show this in action, although admittedly there is
little action at this point.
Why DI?
This is all fine and dandy, but what problems does dependency injection solve?
First and foremost, it decouples the pieces of your application. Dependencies
are not hardcoded but injected at construction time. This makes your components
easier to use together since pieces can be swapped in and out as needed.
It is also the de facto way of adding the objects that are not provided by
Ember.js to your application. The store is an example of such an object but you
can also add analytics integration, a pool of workers and other fancy things
easily.
An added benefit is improved unit testing since you can inject mocks as
cooperators and verify calls made on those.
We are going to look at other aspects of DI in Ember.js in more detail in a next
post. Stay tuned and prepare your mojitos.
Property paths are the heart and soul of Ember.js apps. You use them in
templates and you define dependencies for computed properties and observers
through property paths.
In this post, I concentrate on this latter and show you various ways of
setting up these dependencies through a practical example. There is a pretty good section in the guides
about one path pattern. Here, I intend to cover more (all?) of them.
The simplest, non-aggregate property path is just a series of names,
connected by dots. This designates a property that you can arrive at by
walking the path, segment by segment, where each of them gets you to another
object until you finally reach the property.
(If a path is very long, you should probably think about the dependencies
between your objects and the structure of your code.)
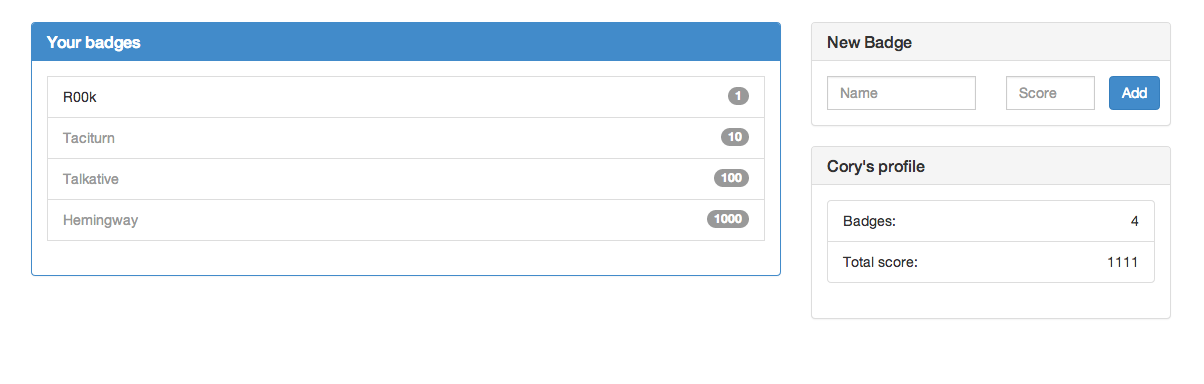
You see that the profile panel has the user’s first name as its header. The
property that gets displayed there can be defined by such a path:
This sets up a computed property (CP) that will be recomputed whenever
user.name changes. The arguments to the property call are called the dependent
keys of the CP and you can pass as many as you would like (although, thanks to
the various property path patterns, you will rarely need a lot).
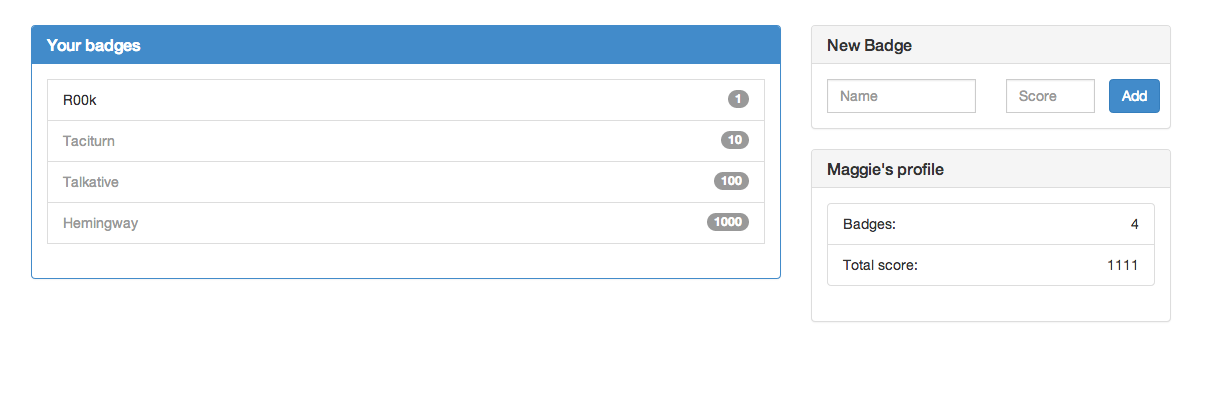
Now, whenever the name property of the user property on the controller
changes, firstName is recomputed and this change gets propagated to all the
instances where firstName is used (e.g in the header of the panel).
Above that, the user.name key also triggers a change if the user object
itself changes. To see that, we turn to the thing you should only ever use for
demo purposes, the __container__ object:
You can see the name change in the header right away:
Aggregate property paths
On other occasions, a CP should depend on an array of items. Whenever something
gets added to or removed from the array, the property needs to be updated.
One example of that is the number of badges in the profile panel:
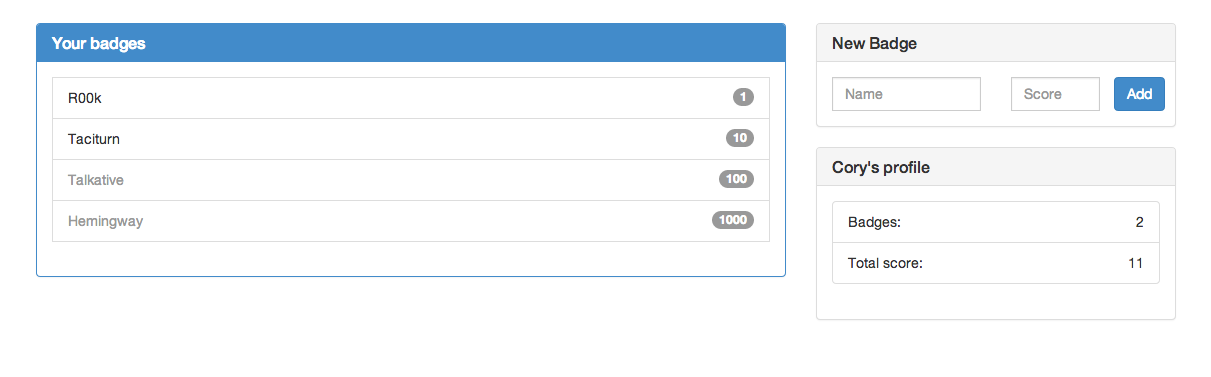
The model here is the array of badges so when we add another one through the New
badge panel, badgeCount gets its new value:
What I said about the user.name path triggering an update when the user
changes also holds true here. If the array of badges was swapped out for another
array, it would trigger the recalculation of badgeCount.
Aggregate property path with a specified property
There are cases where the value of the CP becomes stale also when the items in
the dependent array stay the same, but a certain property of one of them
changes. Ember has a way to express this very succintly.
The example is the “Total score” in the profile panel:
This is the most inclusive of the patterns we have seen so far. It prompts an
update if the model changes, if any item is added or removed and also if the score of
any item changes. If we type this at the console:
, then the total score changes accordingly, even though no item was inserted or
deleted:
Brace yourself
To present the next pattern, let’s assume that not all badge scores need to be
tallied to get the total but only the unlocked ones (which makes total sense).
So the dependent keys for totalScore needs to account for that. That’s pretty
easy:
Starting with Ember 1.4.0, though, there is a more concise way to define the
same, called “property brace expansion”. It works very similar to argument
expansion in the shell:
This establishes that totalScore should be recomputed if either the scoreorunlocked properties of any item in the model array changes.
An important restriction of property brace expansion is that the expansion part
can only be placed at the end of the path, so e.g property('{foo,bar}.baz')
will not have the desired effect.
Computed property macros are the bee’s knees
Computed property macros have several advantages. They are very expressive, very
performant and perhaps most importantly more robust than typing out the property
path patterns by hand where a typo can cause a considerable amount of
head-scratching.
They are also a joy to work with and compose. In fact, all the CP definitions
above can be re-defined by using only macros:
To make all the magic fairy-dust sprinkling efficient, like auto-updating
templates and computed properties, Ember uses getters and setters instead of
accessing properties directly the javascript (and dare I say, the Angular) way. At
its most simplest form, it is object.get(property) and object.set(property).
Howevers, it would not be Ember if we were not provided methods on top of these
primitives to make our hard lives as web developers simpler. In the following
post, I am going to show (some of) these methods through an example, so let’s
go.
Badges, badges, I want more badges
I am certainly in favor of having badges in every application. Discourse is
actively discoursing their badge system so I quickly
sketched out something to get ahead of them.
Let me just paste the code here and then use it to explain what the getter and
setter methods are good for.
You can quickly scroll through the below templates. They are mostly there so
that you get the whole picture. The stuff relevant to this discussion is found
in the javascript code.
On line 9, we want to create a new object with the values provided in the input
boxes (addBadge is the action that gets triggered when the Add button is
clicked, check the template). getProperties will create a javascript object
creating key-value pairs for the passed properties. So the above might e.g yield
{ name: "Silent Bob", score: "2" }. That gets directly passed in to create a
new badge object.
On line 14, we use the mutating pair of getProperties to reset the input
fields. Pretty straightforward.
getEach and setEach
Ember has us covered when we are working with an array and want to get (or set)
the same property of each item.
When the “Unlock all” button launches the unlockAll action, it calls setEach
on the badges (line 14), making all of them unlocked (you can verify this in the
demo by seeing the color of the badge names turn darker - their css class has
been updated). Another advange of setEach is that it guards against calling
set on null or undefined values.
You might know the reader counterpart, getEach as mapBy. It goes through the
array and makes another array by getting the passed property on each item. So in
the above example (line 7), we first collect the score for each badge and then
sum them up by way of reduction. (A shiny example of a non-distributed
map-reduce :) ).
A macro can make nice code nicer
I have used a reduce computed macro before to set up sorting.
I have gotten the hang of it and realized I could use another couple of them
to make the above code simpler (and more performant):
I concluded the previous post on route refactoring by saying
that the fact that the artists.songs route now has the songs as its model will
pay dividends in the future.
I will show one thing that becomes really easy this way and also one
less-known Ember feature that builds on top of that.
Showing list items in a certain order
Even with our superb routing, songs for an artist appear in random order,
differently at each load of the application. This is confusing and it is now
easy to remedy.
The controller backing the artist.songs template is now an ArrayController so
establishing a sort order is a piece of cake:
What I say with these sorting-related definitions is that I want songs to be
shown in descending order of first their ratings and then -should the rating be
the same- by title. That’s all there is to it, those tunes are now aptly sorted:
Sorting by multiple properties, in different directions
There is a slight deficiency in the above sorting API. It cannot sort multiple
properties if the sorting is to be done ascending for some properties and
descending for others. The sortAscending flag is “global” for the
whole sortProperties array.
Taking the above example, it is a perfectly valid request to have songs first
ordered in descending order of their rating and then in ascending order of their
title. But how can we do that?
The API is so explicit it does not need any explanation. In order for the songs
to appear in the specified order, we now need to iterate through sortedSongs
so the #each in the template becomes #each sortedSongs.
Let’s take a look at how it has changed the order of the songs:
Perfect, I would say that is the ordering that makes most sense.
Wait, it gets better still
When first playing with Ember.computed.sort, my initial try was to set up
sortedSongs like that:
That, however, throws an error. Taking a look at the code and the tests, I
realized that the second argument needs to be a property on the same object the
sorting is defined on. This seems “over-engineered” at first but in fact opens
up further possibilities.
Under the hood, Ember.computed.sort sets up an observer not only to the array
being sorted but also to the sort properties. That way, when the sorting
criteria changes, the list is reordered and rerendered automatically. This makes
it possible for the criteria to be easily modified via user action.
To give you an example, I’ll make a button set the rating to happen only by title,
in ascending alphabetical order:
Indeed when the link is clicked, the songs become ordered by title only:
Declarative sorting
Let me finish by pointing out that this arrangment makes it possible to have
several actions that set (or modify) the ordering criteria, without having to
write a single line of code to implement the sorting itself.
A very common pattern in web applications, be them server- or client side, is
resource URLs. We might have a list of users that we want to show at /users and
then different pages related to the user which is encoded in the URL. These
might be e.g /users/dave-hopkins/activity and /users/dave-hopkins/followers.
The pattern is a top-level URL to list all the resource instances, and then
separate pages to display pieces of information regarding specific resource
instances.
The simplest thing that works. However, the above is not ideal especially when
more pages (or views, if you will) are added below the artists resource route.
That’s because the singular artist instance is encoded in the songs route, by
having its identifier (in this case, slug) in the path of that route.
Imagine we need to add additional info about each band. Just blindly extending
the above URL scheme, this would become:
The cracks start to show. The artist for both the artists.songs and the
artists.info routes would have to be fetched in both routes, with identical
code. Nested routes -and how it lends itself to a nested UI- is truly
a masterpiece, a shining emerarld on Ember’s crown. It would be a pity not to
take advantage of it.
DRY up those routes
So we established that the problem is having the artist “encoded” in all routes
below the top-level artists resource. The solution is consequently pretty
straightforward -this always seems to be the case in retrospective-, let’s
extract the path segment that represents the artist:
With the introduction of the artist resource, the duplication is gone, but we
are not done yet. First, we have to define the route and set up its model hook.
Second, since the “routing table” has changed, we’ll have to adjust route names
and code that uses them. Since the naming conventions in Ember have the route
names as their basis, we’ll probably have to change code in several places.
Route changes
Resource routes reset the routing namespace, so the route that corresponds to
the artist route name in the table is App.ArtistRoute:
That is exactly what we had for App.ArtistsSongsRoute in the previous version,
which makes sense. The artist is now fetched one route level higher.
For simple, non-resource routes, the name of the route is the name of the
resource route above (if it exists) plus the name of the route itself. In this
case, the route name is artist.songs which gets resolved as
App.ArtistSongsRoute):
The first interesting thing is modelFor. It gets the model for another,
already resolved route. In Ember route models are resolved stepping down
from the top-level application route. That means that at this point we can be
certain that the artist route already has its model, the artist instance
resolved.
The model of this route is simply the songs belonging to that artist.
The other interesting bit is setupController. We have already come across this
hook before; it is the place to do additional
setup -above fetching the model and deciding which template to render- for the
controller. Since we’ll want to display artist-related data in the template, we
store it in an artist property and we make sure to call _super, the
implementation of this hook in Ember.Route, that sets the controller’s model
property to the model argument in this method.
Templates & controllers
The mechanical part of the routing update is to replace all occurrences of
the artists.songs route name to artist.songs.
What deserves more attention is that the controller for artist.songs now has
the songs of the artist as its model, not the artist itself. That means that we
should adjust the controller type it extends:
All changes are made necessary by the model change. Properties of the artist now
need to be prefixed by artist (e.g name => artist.name) while properties of the
songs no longer need to have the songs prefix since it is the model (e.g
songs.length => length).
This also holds true of the template. To give an example, rendering the
stars for each song can becomes more concise:
The #each helper, without parameters, loops through the items in the model of the
template, in our case, the songs, which is exactly what we want.
That wraps up our route sanitizaion. In the next post, we will take advantage of
the benefit that the songs route now has the artist’s songs as its model.
Last time I showed a way to make the
star-rating component more reusable. The solution employed a useful, low-level
method, Ember.addObserver and its destructive sibling, Ember.removeObserver.
A couple of my readers offered alternative solutions that, I think, make the
code simpler without harming reusability of the component.
This post is going to be sort of a “Readers’ Letters”, showing these solutions
and explaining how they are better than my original take.
Ember.defineProperty
David Chen chimed in in the comments suggesting
using Ember.defineProperty instead of setting up and tearing down an observer:
Ember.defineProperty makes a fullStars property on the component which is an
alias of item.rating (or item.score). We can concatanate ‘item.’ with that
property name in the body of defineFullStars, something I could not get around
earlier.
Finally, the on function, an extension to the Function prototype sets up a
listener and gets called when the component’s init method is executed.
It is better, because there is a lot less code, it is more comprehensible and
there is no need for a second step, tearing down the observer.
Passing in the value rating directly
Ricardo Mendes takes my approach one step further
and shows that it is unnecessary to pass in the name of the ratingProperty.
Passing in the value of the property directly takes separation of concerns to
the next level. The component does not need to know about the name of the rating
property, all it needs to know is its value:
What changed is that instead of ratingProperty=”rating” (which could be
ratingProperty=”score”), the value of the rating itself is passed in. Note that
there are no quotes around rating which establishes a binding.
The definition of the fullStars property now could not be simpler and more
expressive:
Since the component does not know about the rating property, it can’t set the
item’s rating which is a good thing since it’s not its responsiblity. It just
sends an action to its context with the appropriate parameters:
He rightfully pointed out that there is no need to get the rating that was
clicked on via a data attribute. It is already known at template rendering time
and can thus be passed to the action helper.
Instead of adding an extra data-binding property, we rely on the action helper
and we do not need the additional fetching (and parsing) of the property.
Give credit where credit is due
This week’s post was made possible by David, Ricardo and Tom. Their insights made the star-rating component impeccable for which they deserve a huge “thank
you!” from me.
We saw how to turn the star-rating view into a component to
make it more reusable, and less reliant on its context. Everything that the
component needs to do its job had to be passed in, and that is enough for it to
be reusable not just across screens in your application but also across
different applications. Or is it? Let’s take a look at the component code
again:
Is something assumed about the object whose rating our component will display
and set? I’ll give you some time to think about it.
A glove that fits all hands
What we assume is that the item that gets passed in has a rating property.
If we really want our component to be used in all Ember applications (why not
reach for the stars?), then this should not be an assumption that we make.
After all, a player in a hockey team might have a score property and not
rating. We could get around that by aliasing score to rating in our
controller:
However, this is inconvenient for the app developer and is only necessary
because the star-rating component is not flexible enough. It’s as if I had to
reshape my hand to fit the glove.
So let’s make it take the property name as a parameter, too:
That was easy, now comes the harder part, the component code. Previously, the
fullStars property of the component was just an alias for item.rating. We
can’t do that anymore, since the name of the rating property is only known when
the component is used in a template, and can thus differ in each case.
Did Ember let us down this time? Before, it had kept the fullStars property of
our component in sync with the item’s rating. We just sat back and took sips of
our mojito. Now, when the going gets tough, we are on our own.
Well, not really. We are doing some advanced stuff so it’s no surprise that we
have to use advanced tools that are not needed in the majority of cases. Ember
has nice lower-level functions to support us.
We have to set up the property synchronization ourselves but it sounds scarier
than it is. We just have to watch when the item’s rating (score, points,
etc.) property changes and set the fullStars property to that value:
The observer function (ratingPropertyDidChange) gets the object that was
changed as its first parameter and the property name that was changed. In this
case, it does not have to do anything else but set the fullStars property of
the component to the new value of the item’s rating property.
The observer is set up in the didInsertElement function. It is a handy
lifecycle-event for Ember views (and thus components) which gets called after
the view has been inserted into the DOM. This time, we don’t need it to be in
the DOM already but it serves as a convenient way to add the observer.
Lastly, since the observer was added manually, it has to be torn down manually,
too, when it is no longer needed. We do this in willDestroyElement, another
view lifecycle event which gets called before the element gets removed from the
DOM. Also, the code comments mention the following about willDestroyElement:
If you write a `willDestroyElement()` handler, you can assume that your
`didInsertElement()` handler was called earlier for the same element.
This makes didInsertElement - willDestroyElement a perfect pair for manually
setting up and tearing down event handlers (or observers) even if no DOM
manipulation has to be carried out.
I’ve made a jsbin to show how the star-rating component can now be used with
a score property while the component code stays identical:
We now have a star-rating component that is general enough to be used in all
contexts. Go ahead and use it in your Ember app and let me know if I missed
something.
Actually, there are a couple of featurettes -unrelated to its flexibility, as
far as I see- we can add which I might come back to.
This was Part 2 of a mini-series on components. Here is the third post in the series:
Components landed in Ember in 1.0.rc6, in June 2013. They are reusable widgets
that are built on top of HTML and provide a richer functionality. For the sake
of reusability, they are isolated from their surroundings, and -as opposed to
views- do not have access to their context. Everything a component has to know
from the outside world has to be passed in at creation. Anything it wants to
communicate to the outside world needs to be sent via events (or actions, in
Ember parlance).
Usability is meant not just between different parts of the same application but
across Ember applications, too. Once achieved, it would imply that a component
for a specific task needs to be written once and could be used anywhere, just
like jQuery plugins.
That is an ambitious goal which is to expected from an ambitious framework. We
are not quite there, yet, and the specifics are still under discussion.
Nevertheless, components are a great thing and you should start using them
today, if you have not already.
“View”.replace(“Component”)
Wherever you would use a component today, you would have used a view before
components were possible. Views still have their role in an Ember app but when
existing html functionality is enhanced to give a richer, or more complex user
interaction and reusability is important, you should reach for components.
In this post, I’m going to show how to swap out an existing view with a
component. The example I’m going to use is the star rating view from the Rock &
Roll application.
App.StarRating=Ember.View.extend({classNames:['rating-panel'],templateName:'star-rating',rating:Ember.computed.alias('context.rating'),fullStars:Ember.computed.alias('rating'),numStars:Ember.computed.alias('maxRating'),stars:function(){varratings=[];varfullStars=this.starRange(1,this.get('fullStars'),'full');varemptyStars=this.starRange(this.get('fullStars')+1,this.get('numStars'),'empty');Array.prototype.push.apply(ratings,fullStars);Array.prototype.push.apply(ratings,emptyStars);returnratings;}.property('fullStars','numStars'),starRange:function(start,end,type){varstarsData=[];for(vari=start;i<=end;i++){starsData.push({rating:i,full:type==='full'});};returnstarsData;},actions:{setRating:function(){varnewRating=$(event.target).data('rating');this.set('rating',newRating);App.Adapter.ajax('/songs/'+this.get('context.id'),{type:'PUT',context:this,data:{rating:newRating}}).then(function(){console.log("Rating updated");},function(){alert('Failed to set new rating');});}}});
The most important thing about components is that they do not have access to
their context so any code that does use it needs to be changed.
Back when I wrote the code, I was, somewhat surprisingly, wise enough to use
properties whose semantics reflect the inner operation of the widget, namely
fullStars and numStars. Now we can reap the benefits of this foresight,
because the entire stars and starRange method can remain untouched. It is
only the definition of the fullStars property and the setRating action that
need to change.
Let’s quickly sketch up the interface of the component. It will need the item
whose rating it sets/displays, the name of the action it sends to the outer
world when a new rating is set (setAction) and the maximum number of stars.
Having established that, the code transforms to the following:
fullStars is now the rating property of the item (in our case, a song) that was passed in.
When a star is clicked, the setRating action is triggered. Here, again, the
rating is updated on the item that was passed in. After that, it sends the
action that was passed in as setAction to the controller it was used from,
passing along the item it received. That is the aforementioned way of sending
messages outside.
(You might wonder what sendAction does. It is a shorthand form of
sendAction(this.get('foo'), ...).)
Rendering the component
The template will only have minor modifications made to it. Here is what it
looked like in its infancy, back when it was a view:
The data-template-name of a component needs to start with components and the
name of the component needs to have a dash in its name to prevent name
collisions with html tags.
The other changes relate to the essence of components, namely that they are not
embedded in their context but work in isolation. That is why we both property
lookups (in #each stars) and action handlers (action "setRating") both target
the component and thus the target does not need to be defined explicitly.
Even more importantly, an action fired from a component’s template will look for
that action in the component but will not bubble to the controller (or route).
That again enhances the component’s isolation and thus its reusability and shows
the care that was made when desinging it.
(Unfortunately, if an action by that name is not found on the component, it will
die a silent death which makes debugging more difficult).
Using the component
Now comes that part I love most. Using our polished component is just like
calling a function in a language where state is not shared. You pass in
everything the component needs to do its bidding and be done with it:
We saw how the component will send the action passed in as setAction and pass
along the item (now: song) with it. We just need to handle it the classic Ember
way, either on the controller or the route:
123456789101112131415
App.ArtistsSongsRoute=Ember.Route.extend({(...)actions:{setRating:function(song){App.Adapter.ajax('/songs/'+song.get('id'),{type:'PUT',data:{rating:song.get('rating')}}).then(function(){console.log("Rating updated");},function(){alert('Failed to set new rating');});}}});
Observe how the action to update a song’s rating to the backend had to be moved
to the route, instead of the view/component where it does not belong. Another
win for components.
Don’t get confused by the two different setRating actions. The first is the
one defined on the component that gets triggered via the action helper from the
component’s template, the second one is the action name that needs to be
passed in and has to match the name of the event handler on the route.
Towards better reusability
I hope you got a taste of why components rock and what steps are taken in their
design towards their reusability. However, it’s up to writers of components to
go all the way and make components general enough to fulfill this promise.
That’s what I’m going to strive for in a later post.
This was Part 1 of a mini-series on components. Here are the subsequent posts in the series:
A few weeks ago I built up a very simple identity map to
get rid of a bug in highlighting active links. I introduced promises in order to
leverage the fact that Ember.js blocks in model hooks until the model is
resolved (or rejected).
In this post, I am taking a step back, and converting all the ajax calls that
fetch data from and store data to the backend to use promises. I am also going
to extract the most basic adapter that exists, just to do away with the
repetition in the XHR calls. Once I have these in place, I will able able to
build nice features on top of that.
App.TheMostBasicAdapterThereIs
All calls go to the same backend and talk in json so these can be trivially
extracted:
With that out of the way, we can see where these were used, and replace
Ember.$.ajax with App.Adapter.ajax. In the process we are also going to
convert the callback-style code to use promises, a worthwhile
transformation.
Don’t call me back, promise me you’ll be there
Here is what the code for fetching all the artists from the API looks like after
applying the adapter change:
Notice that the model initially is an empty array and only when the ajax call
returns successfully does that array get filled up and the template rerendered.
Not a big deal in itself, but if in a child route we rely on the array
containing all the artists (e.g when looking up the identity map or using
modelFor), we can be bitten by the async bug. Promises to the
rescue.
As I mentioned in the identity map post, if a promise is
returned from a model hook, Ember.js will block until the promise is resolved
(or rejected). Let’s follow in Ember.js footsteps and convert the above code to
return a promise:
We wrap the promise returned from the App.Adaptar.ajax call in another promise,
which resolves with artist objects instead of the raw data that is returned by
the API. In the rejection handler, we pass along any potential error responses
by rejecting with the same error that we got.
Next, we do the same thing in the child route. We go from here:
To get the “100% promisified” seal, we’ll transform the create calls, too. I’ll
only show the one to create an artist since creating a song is the same.
12345678910111213141516
createArtist:function(){varname=this.get('controller').get('newName');App.Adapter.ajax('/artists',{type:'POST',data:{name:name},context:this}).then(function(data){varartist=App.Artist.createRecord(data);this.modelFor('artists').pushObject(artist);this.get('controller').set('newName','');this.transitionTo('artist.songs',artist);},function(reason){alert('Failed to save artist');});}
Here, there is not that much of a difference, the success and error callbacks
are replaced by fulfillment and rejection handlers.
The source code with these changes can be got here.
Further studies & posts
You can acquire a deeper knowledge about promises by reading Domenic Denicola’s
“You’re missing the point of promises” post and using that as a
base for further exploration. Steven Kane’s excellent promise-it-wont-hurt package
makes you solve increasingly difficult challenges with promises, which is the best way to learn.
Promisifying all backend calls sets the stage for other routing-related
improvements. Stay tuned for more.